Buying a home is one of the most significant financial decisions you’ll ever make, but the process...
Garbage Disposal Maintenance and Myths
A garbage disposer can be a kitchen’s
best friend
Some people burn their table scraps in an incinerator. Others simply feed them to a family pet or toss them with the trash. In New York City and other communities, garbage disposal units have earned municipal blessing as a safer, more sanitary way to get rid of leftovers.
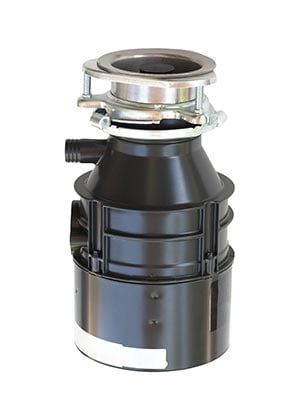
 The typical garbage disposal based on the original InSinkErator model
The electric-powered gadgets usually mounted under a kitchen sink date to the 1930s, when General Electric introduced its version of an earlier invention that mashed uneaten food into bits small enough to pass through plumbing. Today, about half of all American homes use variations of the original InSinkErator, or garburator as it’s called in Canada, to help reduce the crush of an estimated 35 million tons of edible waste each year otherwise destined for a land fill.
Typically costing from under $100 to $500 or more depending on horsepower, noise level and special features such as anti-jamming and auto-reverse circuitry, continuous feed disposals dominate the market. They operate with a simple flip of a wall switch and continue to grind away until switched off. One drawback, of course, is their threat to careless fingers and hands.
Somewhat more pricey and far less common batch-feed units, which require a cork-like stopper before going into action, appeal to families with small children and folks with a tendency to drop silverware and wedding rings down the drain. Unlike a trash compactor, with which it is sometimes confused, a batch feed won’t take solid items such as cardboard or aluminum cans.
 Garbage disposals that require a cork-like cover to start are safer for families with kids
Contrary to a common notion, neither disposer works like a blender. Instead of blades, both use impellers to force food onto a flat plate with rotating steel mashers. An inner wall studded with “teeth” does the actual grinding into the drainpipe. With minimal TLC, they’re convenient, reliable and a valuable aid to keeping a kitchen clean.
Quick Tip
Don’t feed it that!
Not all kitchen scraps belong in a garbage disposal. Coffee grounds and stringy vegetables are better recycled in a compost bin. Banana peels and bones can clog drain pipes. The jury’s mixed on several questionable items, but it’s pure myth that egg shells sharpen shredders or hot water flushes grease.
Garbage Disposal Maintenance
The cardinal rule of troubleshooting garbage disposal units is never start by sticking your hand down the hopper. That’s the grinding chamber where really nasty mashers can suddenly spring back to life and do major damage to your fingers.
Instead...
Press the red “Reset” button. Then check the circuit breaker. Still not even a hum? That means it’s either a bad switch or faulty unit. If replacing the switch doesn’t work, you need a new disposer and perhaps a visit from a plumber.
In case of hum...
A humming sound, though, means something’s stuck in the flywheel, which you can spin free with a wrench or broomstick. Leaks usually result from loose bolts, hose clamps or failed plumber’s putty. If slow draining’s the problem, clear the discharge pipe and trap with a sink auger.
Installing a new disposer

It’s a kitchen upgrade well within the talents of a reasonably handy homeowner
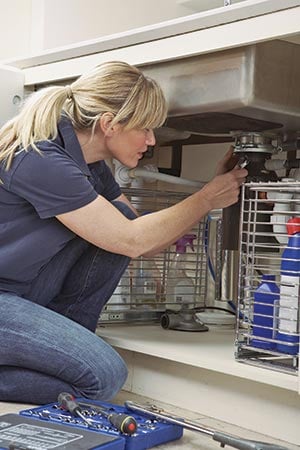
Installing a garbage disposal unit may not be as simple as, say, changing a light bulb. But from start to finish, it shouldn’t take more than an hour to replace an old model, or under half a day for a completely new installation depending on your skill level and your sink’s current plumbing.
Variables may include the location of your drain line and a source of electrical power (OR electricity)
A drain line that comes out of the wall takes a different setup than a floor drain. If there’s no power outlet under the sink, you’ll have to install one or get an electrician. Before starting anything, be sure local codes don’t ban disposers because of limited sewer capacity.
Once cleared for action, it’s time to go to work
First, look under the sink and make sure a disposer will fit. Then, turn off the power and definitely don’t run the faucet during installation. The actual attachment involves mounting the unit to the sink’s strainer body, attaching wires to the motor for power and finally connecting the new drain line to the old plumbing. Instructions can be a little tricky to DIY newcomers, particularly if you plan to add a dishwasher to the hookup. So feel free to have your work checked by an inspector, or call a licensed professional for the whole installation if you fear you’re in over your head.

